Open your image in Photoshop. The highlights point should go up and the shadows point should go down.
Photoshop Curves Tool 6 Techniques Every Photographer Must Know Techradar
Accomplish this by adding two points to your lineone at the lower end of the line and the other at the upper end.
. This can be accomplished if you position yourself at an angle somewhere along the curve where this can occur. You can use the Tone Curve on individual channels to edit different tonal areas in the image. For example one of the most common uses for Curves is to improve contrast in an image by adding whats called an S curve meaning that we reshape the curve into something that resembles a letter S.
Name the layer Curves 1 and click OK. I first converted both images to black and white using Silver Efex Pro 2. First lets talk about your Histogram and how to use Tone Curves.
The S curve and the use of perspective can be used to create a very dynamic image. You can download this image so you can follow the tutorial. For this method youre aiming to create an S-shaped curve with your diagonal line.
Lower contrast with an inverted s-curve. What is S curve in editing. When used in just a portion of the photo its imperative it targets a key part of the primary subject.
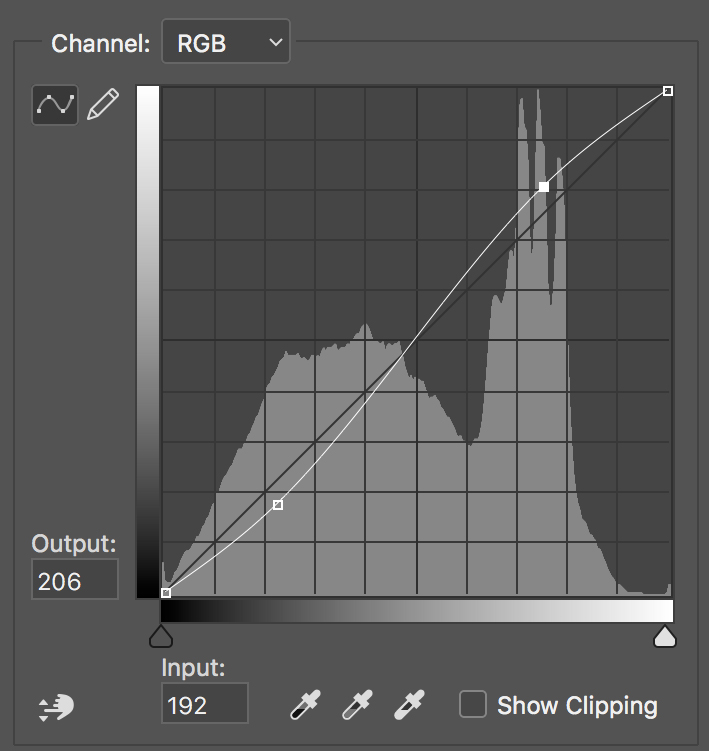
Choose the channel you want to edit from the drop-down menu. Light is one of the most important elements in landscape photography. So when you dont have light the next best thing to look for is a lovely S-Curve leading into your image.
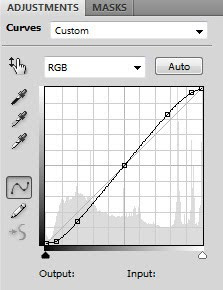
Since the shape of the leading line looks like the letter S or part of the letter S it is called the S Curve. Add a Curves Adjustment Layer as in fig below Layers New Adjustment Layer Curves. If your photo is in CMYK you will see cyan magenta yellow and black channel.
Start your edits by adding three nodes to the curve dividing it up into quarters. A Landscape Photography Composition Technique. Try It Now For Free.
Its a public parking lot that is free if you are traveling by foot. A big hitter with your curves what is known as the S curve. Editing the Shot.
Things may look good on the curved display but will look different when projected flat. A little does a lot. The S curve is a type of leading line which when used correctly can improve the composition of the image helping to create strong images that can keep viewers engaged for a longer period of time.
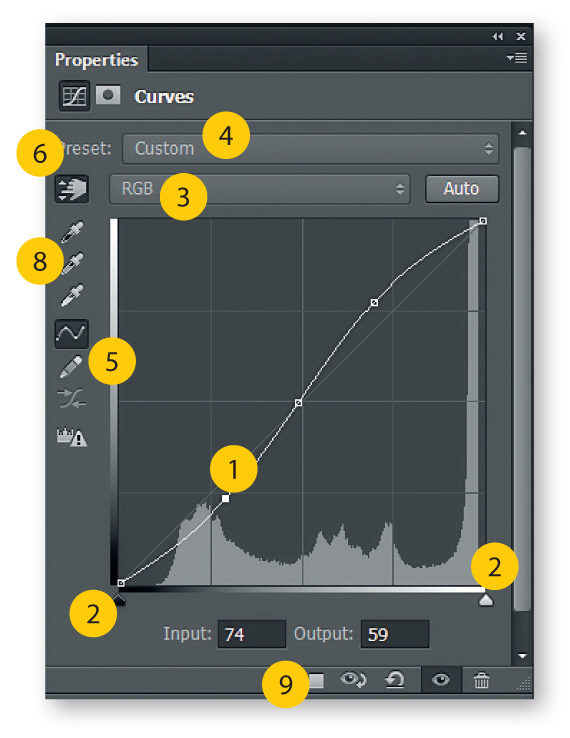
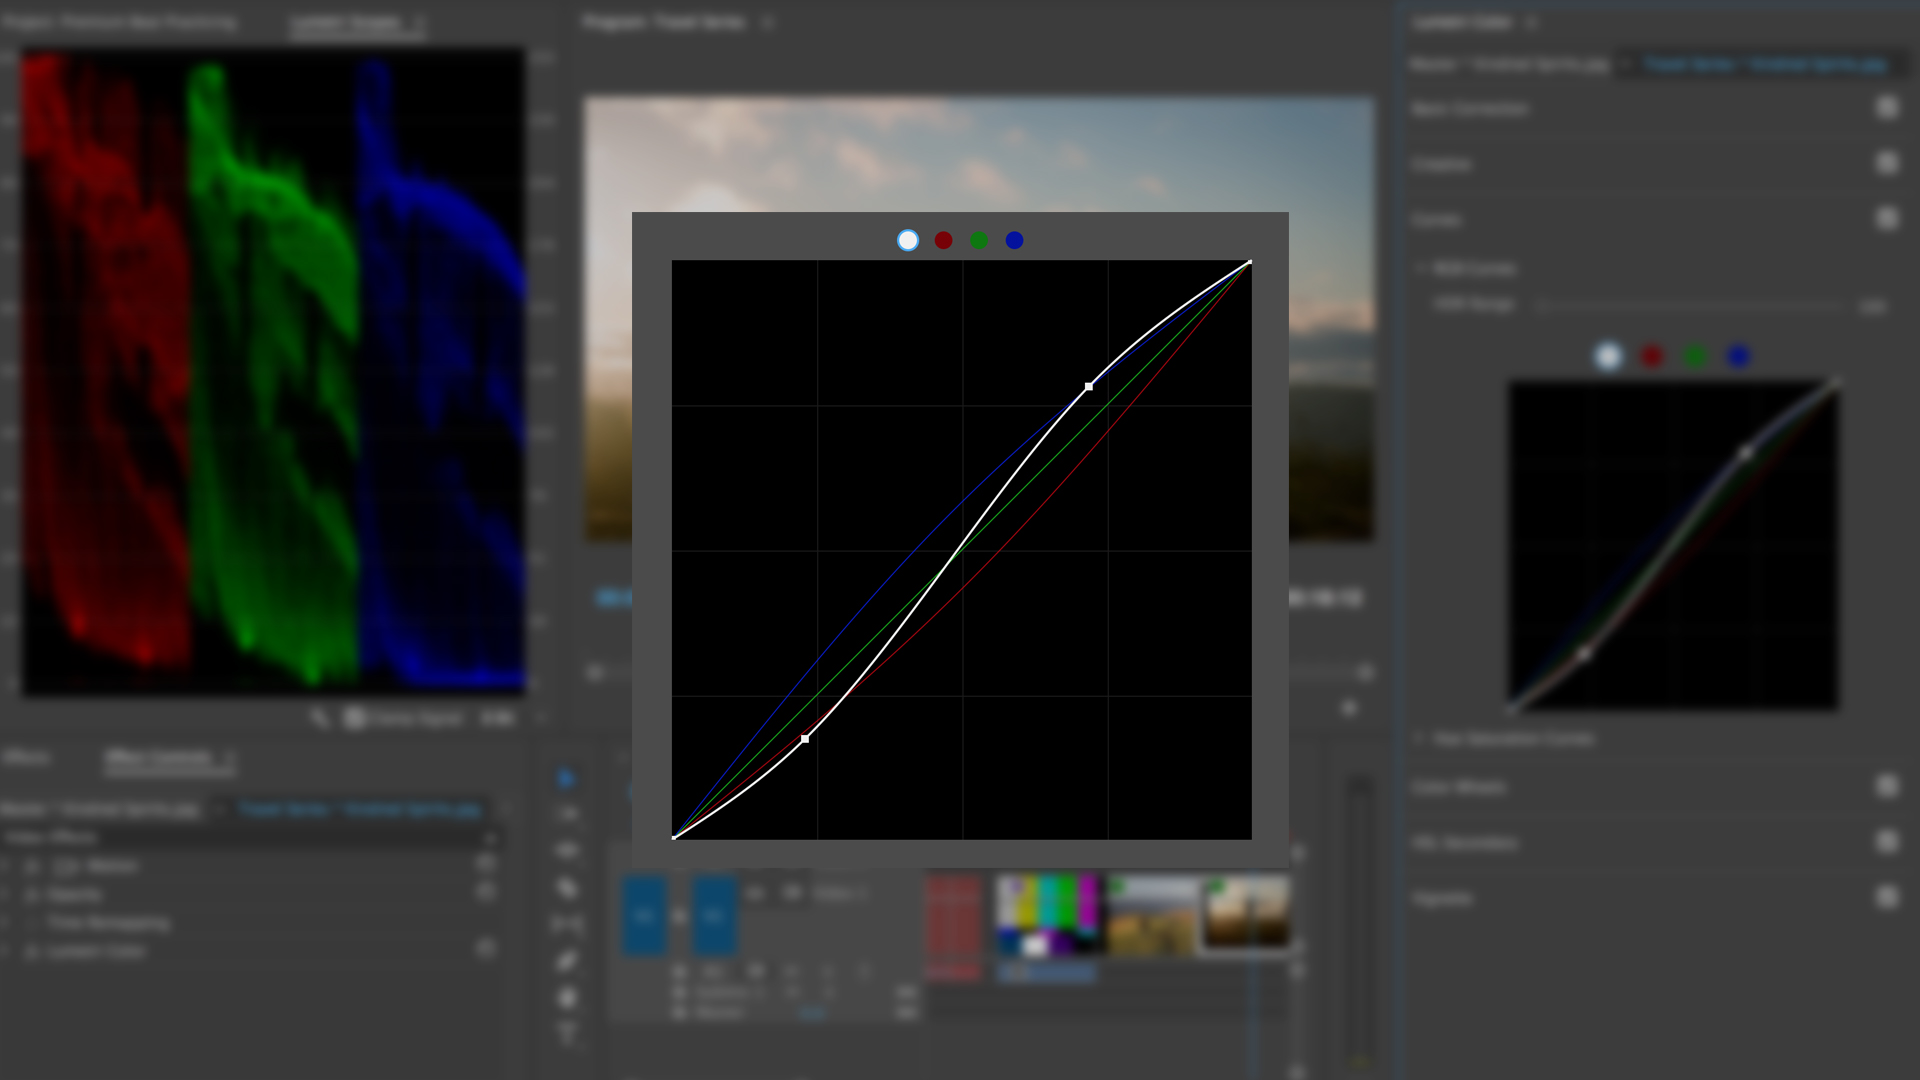
The S curve neednt encompass full-image real estate. But the photos are usually RGB so youll see red green and blue. In this post Ill share 4 steps for improving your photos.
The final image was edited in Aperture with the help of Niks Silver Efex Pro 2. When talking about the. Learn How to Read Your Histogram.
The classic way to use tone curves in most image editing software whether its Lightroom or Photoshop or any other is to increase the contrast of the entire image with a classic S-curve. If you intend to display photos in a flat 2D plane editing on a curved 3D surface will likely be an issue. Curves is best applied as an Adjustment Layer.
When hidden in and amongst chaos its beauty and fluidity go unnoticed. When you drag the upper portion of the line further up and the bottom portion of the line further down it forms an S curve and creates a contrast in the picture. Dragging the Red curve up will increase the intensity of Red while dragging it down will add Cyan.
As the line continues throughout the photo have it recede into the distance so it has a natural exit point. Known in painting as the line of beauty the S-curve is a line that travels back and forth horizontally through your image as the eye proceeds vertically through the scene. Dragging the Green curve up will increase the intensity of Green while dragging it down will add Magenta.
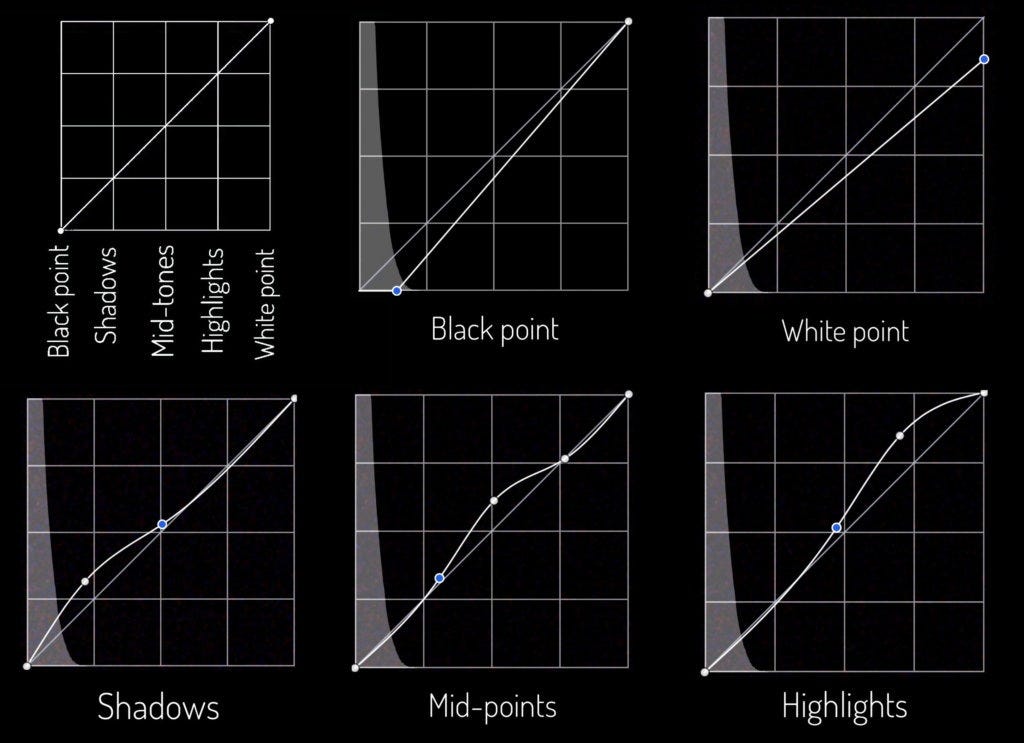
This allows it to stand out and be more readily noticed. The left node marks its shadows the middle node marks its midtones and the right node represents its lights. Then edit the photo by.
That is how the line becomes a curve. Now on the right hand side of the histogram highlightswhites bring that up slightly. To create an S-curve tone curve simply create at least two points one in the highlights and one in the shadows.
The highlights become lighter and the shadows become darker. Compare the images that accompany this weeks tip. Superior Quality Photoshop Actions Tones.
To switch between the linear tone curve and custom tone curve click the button on the bottom right of the tone curve panel then set points on the tone curve. Here is the original image we will use to show what can be achieved using the S Curve feature. Distortion would be the biggest reason not to use a curved display assuming the curve doesnt affect color calibration too.
15 PS Action Collections. Used by over 2 million brands designers and creators. The green circle on the map below is the location where the S Curve photo was taken.
The S curve. Ad Enhance your photos with filters layers graphics text overlays. Each node represents one tonal aspect of the image.
You can do create adjustments like a cross-processed or solarized look using curves. For full control of the tone curve in Lightroom you need to change the point curve from linear to custom and add curve points to the curve then adjust by clicking and dragging on the points. Curves Tool also helps you to modify the Primary Colors as well with different curves available for different colors.
To do the S curve towards the left-hand of the curves in the shadowsblacks of the histogram pull the line down slightly. The S curve is popular due to its simplicity as the name really explains it all. Ad Remove Backgrounds And Add Shadows To Your Photos With Canva Pro.
What does the curves tool do to a photo. This curve excels at raising image contrast. The histogram is represented by the curve as well blacks on the left whites on the right grey in the middle You can adjust the contrast overall main curve or by each color red green blue Create an s-curve to add contrast.
When used in cityscapes and landscape photography the S-curve functi. Ad Best Photoshop Actions Presets. Go to the Layers Panel click the Create Adjustment Layer icon at the bottom and choose.
But you dont always have light.
A Beginner S Guide To Color Curves For Powerful Correction

7 Tone Curve Tips That Will Make Your Editing Better Fstoppers

How To Use The Tone Curve In Lightroom Hue Hatchet
A Beginner S Guide To Color Curves For Powerful Correction

Confused By The Tone Curves This Is How They Work And How To Use Them Diy Photography

Understanding Curves Tool In Photo Editing Lightx App
The Coffeeshop Blog Coffeeshop Editing 101 S Curve Pop Ps Pse Action And Unwrapped Tutorial
Snapseed Curves Tool Enhances Colour And Tones Makes Your Photos Pop By Smartphonephotographytraining Com Medium
0 comments
Post a Comment